Playing catchup documenting the tools I have created for the Power Platform ToolBox.
Another “equivalent” (the quotes means it really isnt, yet) tool to one that is available in the XrmToolBox, made by the mighty, legend of our community Jonas Rapp, Bulk Data Updater.
My version has a little less yellow and blue, but mimics the functionality. Want to populate that new field with something on thousands of records? Tickle lots of records to trigger plugins or flows? Need to put some data in that column calculated from others? This tool will hopefully help!
Using the tool
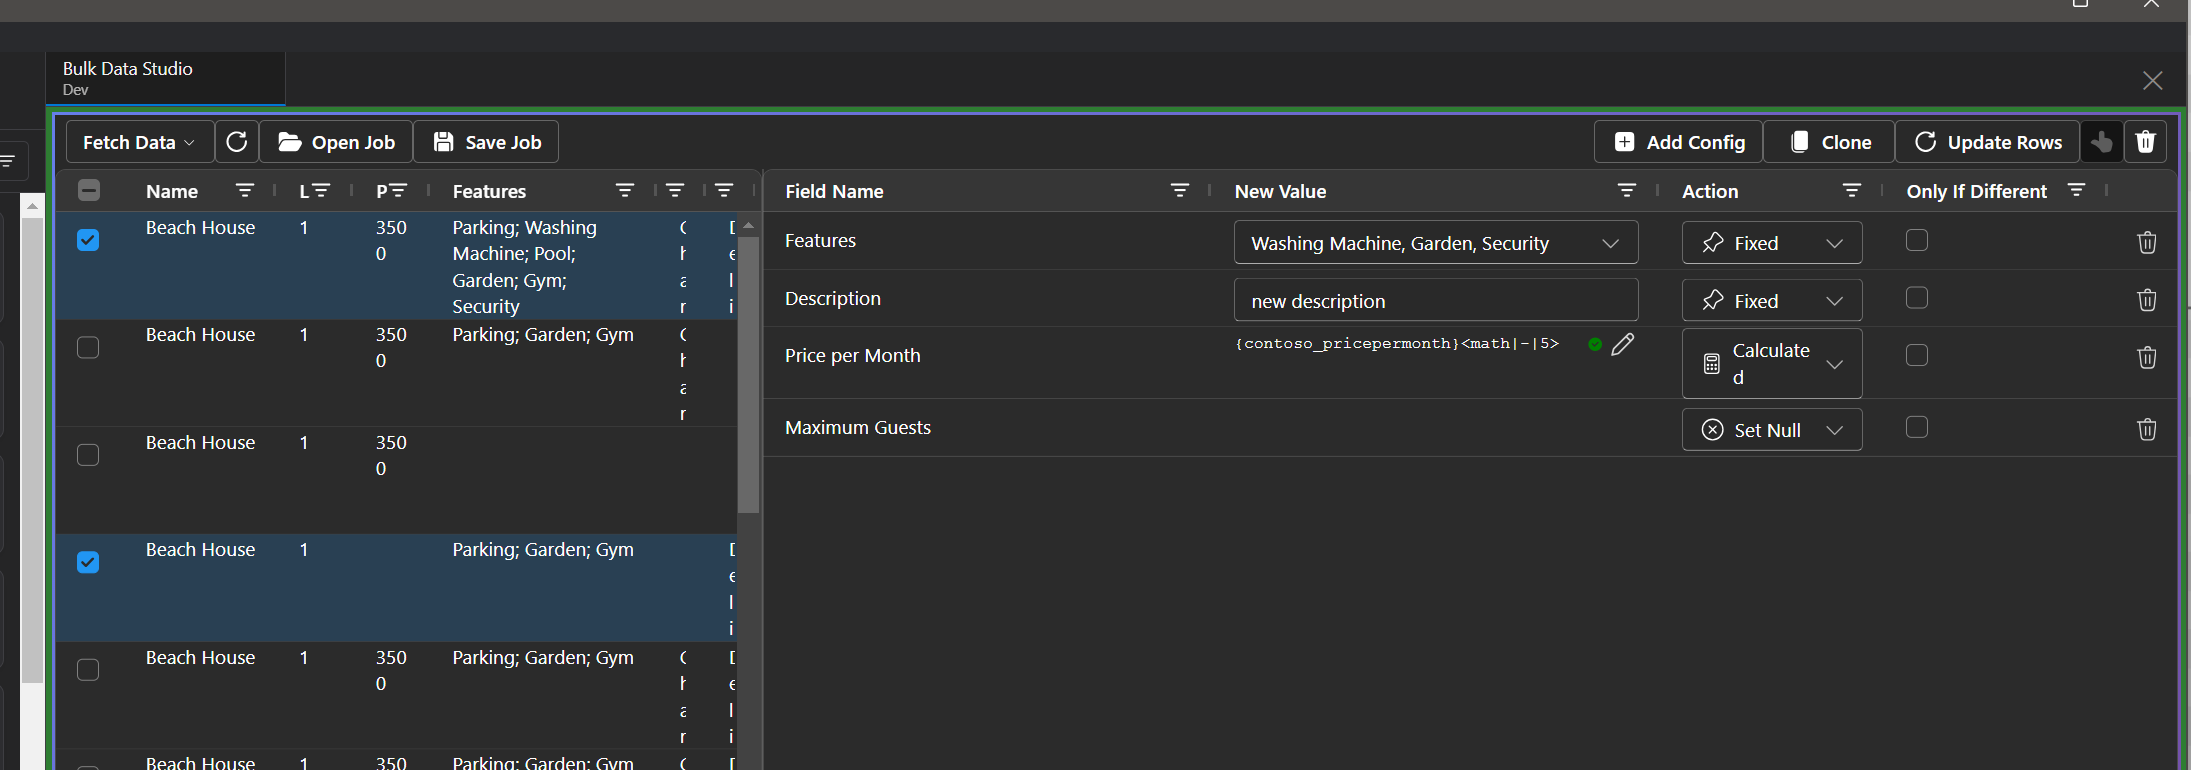
On logging in you are displayed 2 grids, the left being the data that you are going to edit, the right the changes you are going to make.
Firstly, select your data by clicking on the Fetch Data button
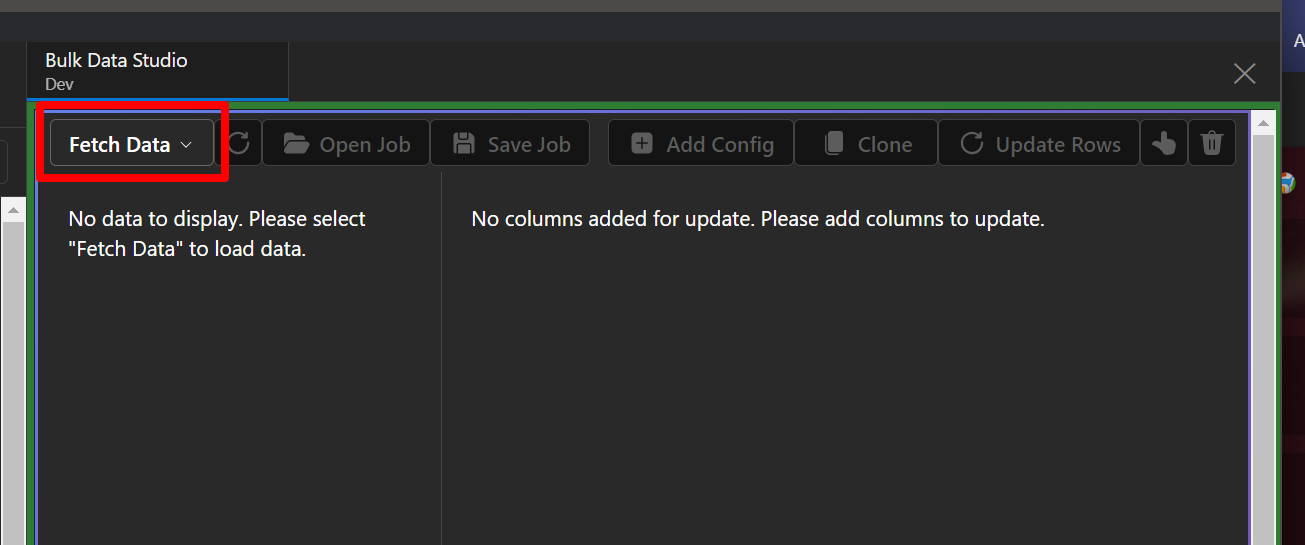
Either select Open View or use raw fetchxml.
Open view presents you with a table and view list, then shows you the raw fetchxml so you can tweak to use in the fetchxml editor.
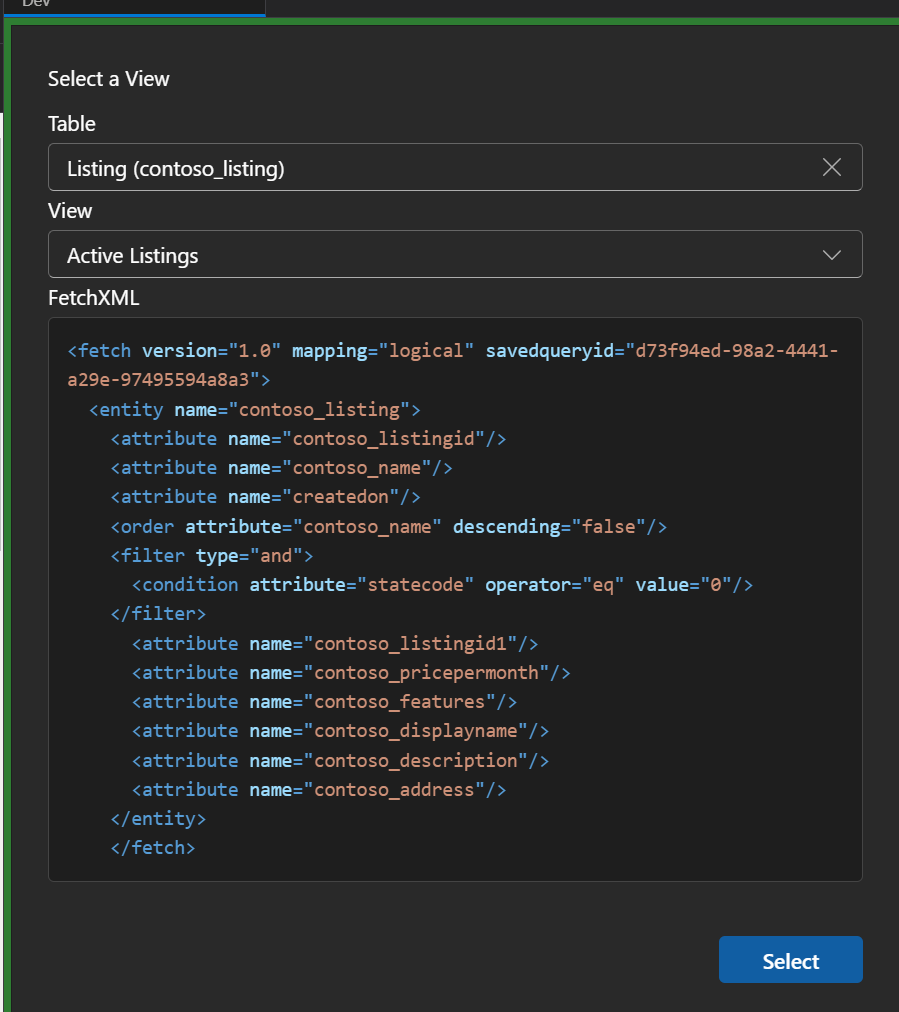
Once you hit select, the query is run and the results displayed.

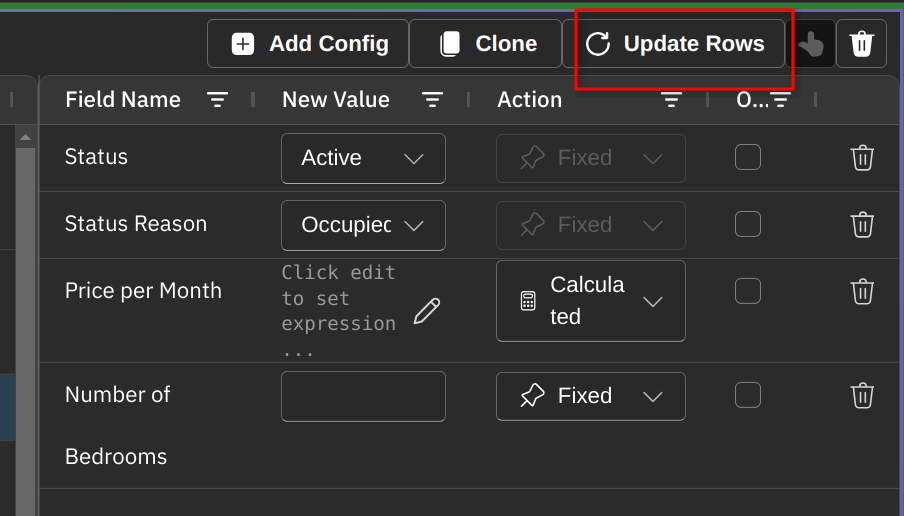
Now we need to decide on what we want to update and to what. Hit the config button to be displayed a list of the fields in the view. Hit the toggle to show all fields on the table.
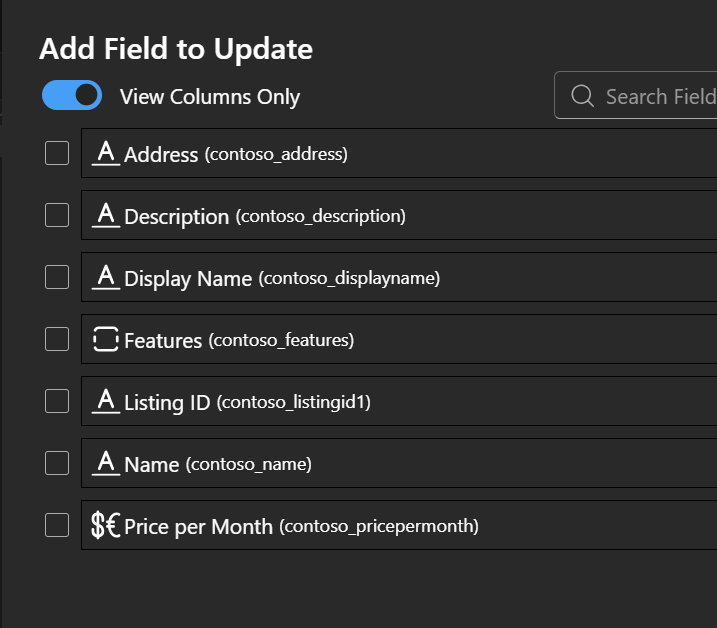
The options for updating dependent on the field type of course.
Fixed Changes the value to what is entered.
Touch Replaces the value as if it has been updated, to trigger downstream flows and plugins.
Calculated Determine the value from simple calculations. See the Calculation options.
Set Null as it says, blanks it out.
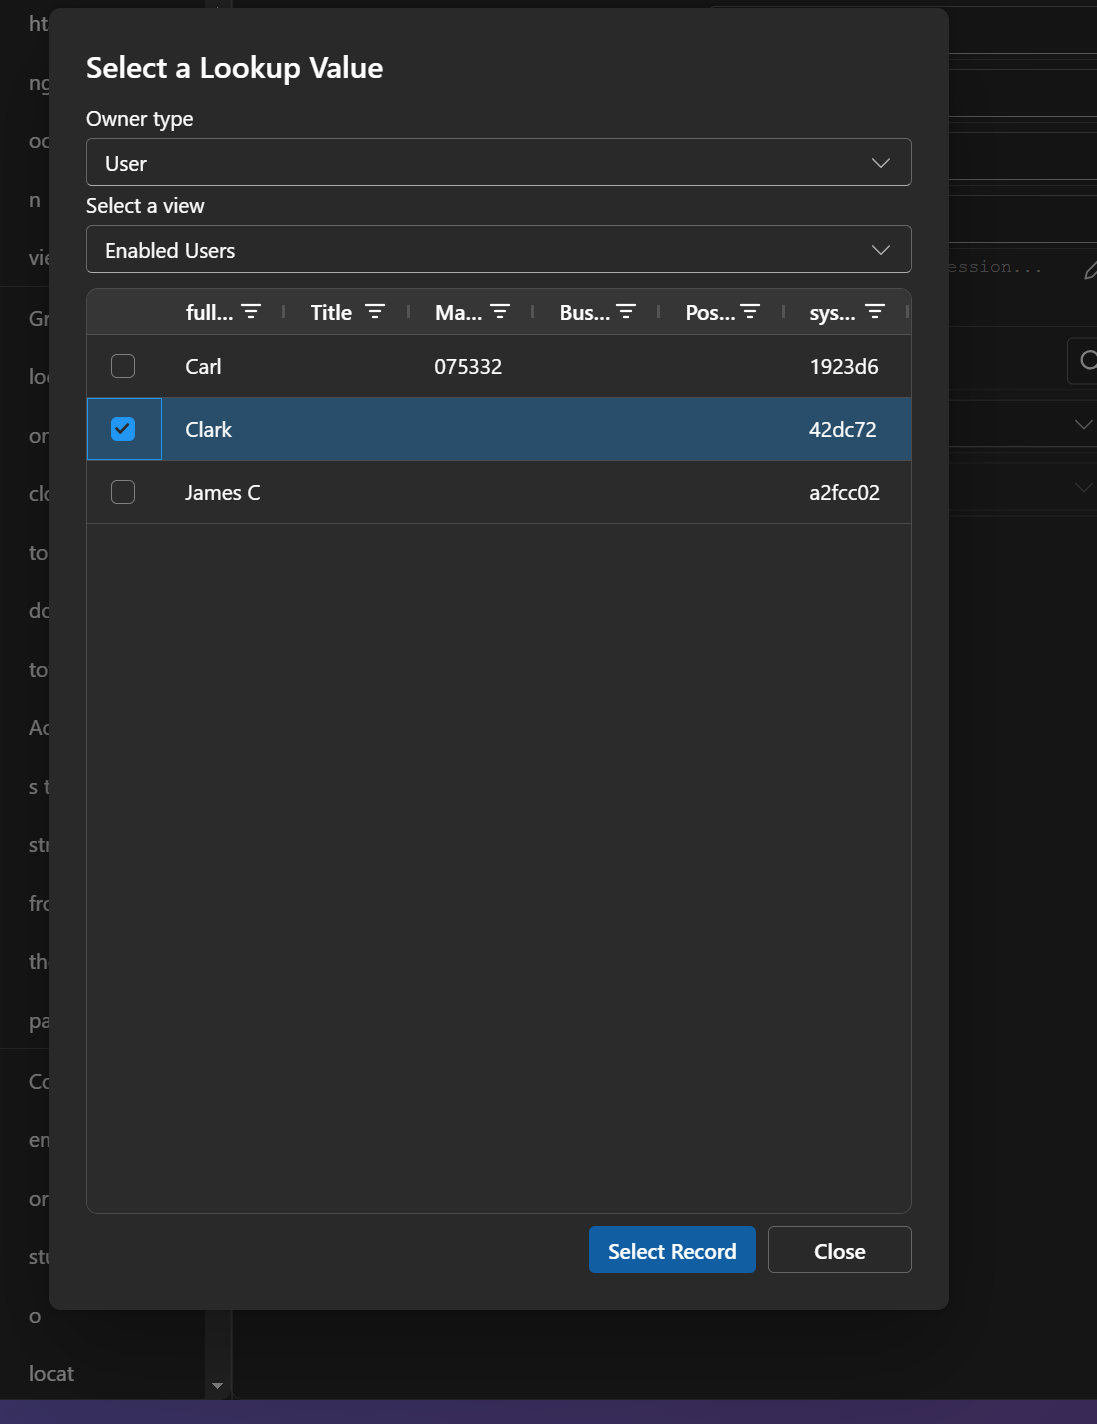
Also, the capabilities of the value selection will differ depending on the field types, from as simple as entering text, selecting a lookup value or choices.
Note
For status and state, we have a special case, they need to be linked, so you need to change both together.
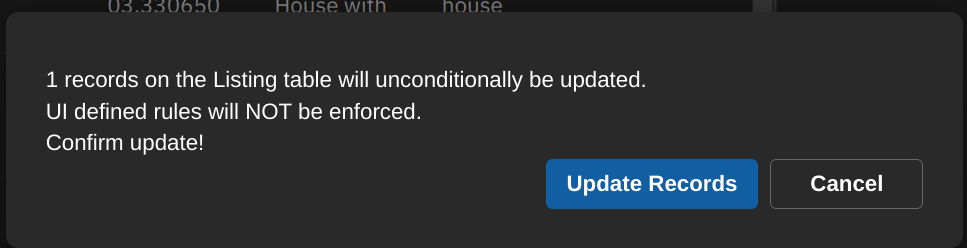
Once you are ready, hit the Update Rows button and then confirm with Update Records
Calculation options
When you choose Calculated, you can build expressions using field tokens, system tokens, formatting functions, conditional logic and simple math.
Field tokens
Use values from the current row:
| |
Examples:
| |
System tokens
Add system date/time values:
| |
Example:
| |
**Conditional logic
**
Use iif for if/else expressions:
| |
Supported operators: eq, ne, gt, gte, lt, lte, contains, startswith, endswith.
Example:
| |
Formatting functions
Useful text functions include:
| |
Examples:
| |
Math operations
For numeric values:
| |
Operators: +, -, *, /
Examples:
| |
Quick tips
- Use preview to validate expressions before running updates.
- Keep field names in your expression aligned with the fields fetched in your query/view.
- For status and state updates, set both values together.
Cloning Records
Another powerful feature is the ability to clone records. This creates copies of existing records, optionally including their related child records with properly remapped relationships.
Basic Workflow
- Select records to clone via view or FetchXML
- Configure clone settings to specify which fields to exclude and which child records to clone
- Review the configuration to ensure it meets your needs
- Execute the clone to create the copies
Step-by-Step Process
1. Select Your Source Records
First, select the records you want to clone using the same process as the update feature:
- Click Fetch Data
- Choose Open View or use FetchXML
- Select the records to clone
2. Open Clone Settings
Once you’ve selected records, look for the Clone button in the toolbar to open the clone configuration panel.
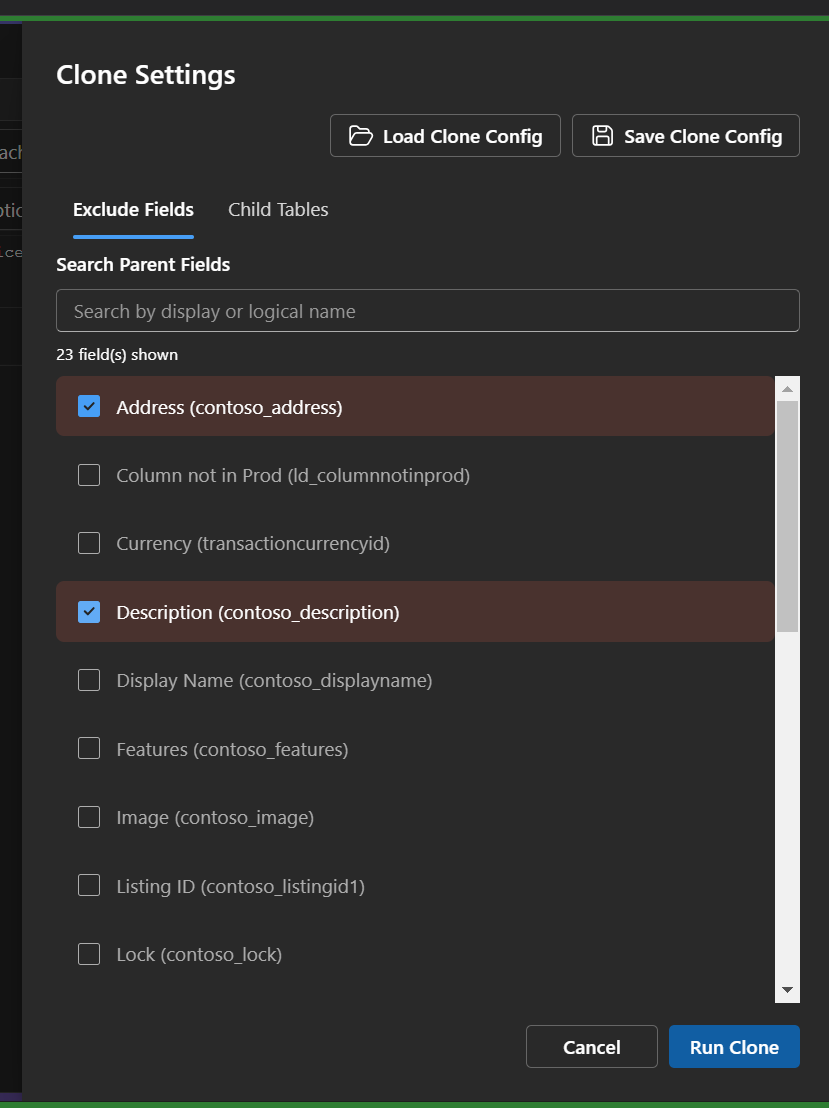
3. Configure Parent Field Exclusions
In the Exclude Fields tab, you can specify which fields should NOT be copied to the cloned records.
Fields automatically excluded:
- Primary ID (the record identifier)
- Alternate Keys (any uniqueness constraints)
Fields you typically exclude:
- Unique identifiers or codes that should be different in the clone
- Read-only fields
- System-calculated fields
- Fields that shouldn’t be duplicated
How to exclude:
- Search for fields using the search box (searches both display name and logical name)
- Check the checkbox next to fields you want to exclude
- Excluded fields appear with a red background
Note
Warning: If you exclude no parent fields, cloned records will be identical to the originals. This may violate uniqueness constraints on certain fields.
4. Configure Child Table Cloning
In the Child Tables tab, you can specify which related records should also be cloned.
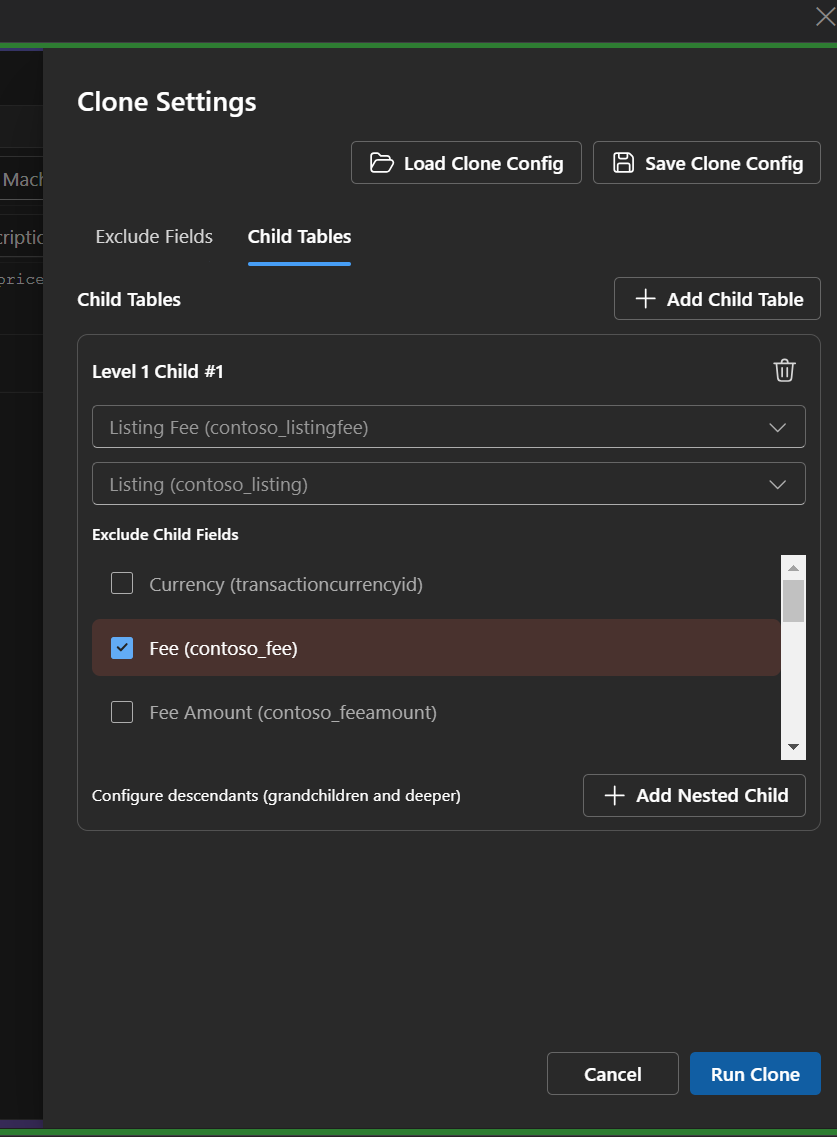
How to add child tables:
- Click Add Child Table to add a child table configuration
- Select Child Table: Choose which related table to clone from
- The dropdown shows tables that have one-to-many relationships with your parent table
- Select Parent Lookup Field: Choose the lookup field that links child records back to the parent
- This is automatically populated if only one link exists
- The system will automatically remap this field to point to the cloned parent record
- Exclude Child Fields: Optional - select which fields in the child table should not be copied
- Just like parent exclusions, helps ensure uniqueness or avoid sensitive data
Example: Cloning an Account with Contacts
| |
5. Review and Execute
Before cloning, review your configuration:
- Parent fields being copied: Displayed in the status message
- Child tables: Listed with their lookups and exclusions
- Warnings: Alerts if no parent fields are excluded
Once satisfied with the configuration, click Run Clone to execute.
A confirmation dialog will appear reminding you that:
- New records will be created in Dataverse
- Any active Power Automate flows, plugins, or business rules will be triggered on these new records
- The operation cannot be undone (delete the clones manually if needed)